
Typically, a transaction is divided into two types: income (e.g., receiving salary, bonus, borrowing money, collecting debts…), or spending (e.g., buying food, shopping, lending, repaying debts…). This article explains all the transaction fields in more detail.
You can find an overview guide to create a transaction here
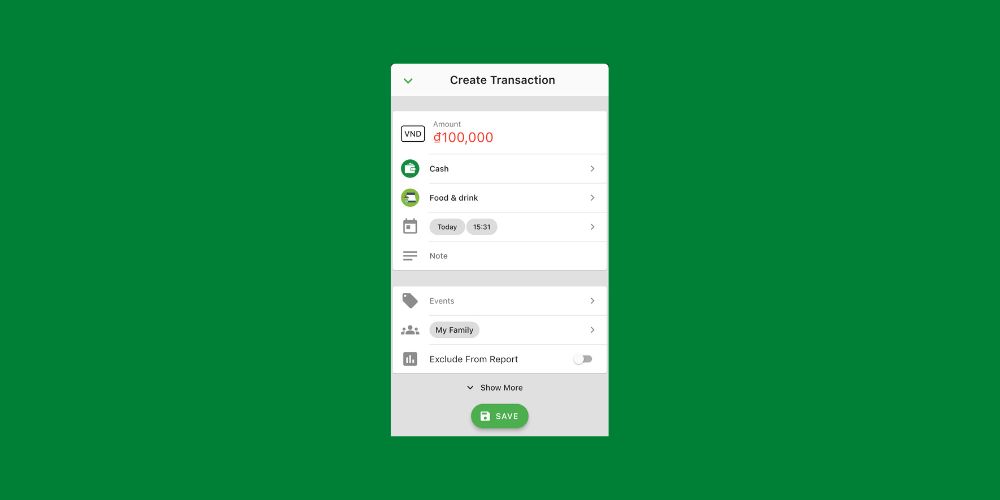
The figure below shows the details of all the transaction fields. Note, to fully display all the fields as below, you need to click the Show More button at the bottom of the screen.

1. Amount: The amount of money. You can change the currency of the transaction by selecting the currency icon next to Amount (USD).
2. Select a Wallet: Select a wallet to record the transaction.
3. Select a Category: Select a category to categorize transactions. View details of the article Create and manage categories.
4. Time: The transaction date and time.
5. Note: Add a note to the transaction.
6. Events: Events (formerly known as Labels) can be used to group and categorize transactions according to any purpose you want such as a trip, spending for someone, a party… You can assign up to five events to a transaction. See the details of the article How to use the Events.
7. Share with Group: Share the transaction with the selected group. See more details in the article How to Share data with a Group.
8. Exclude From Report: If selected, the transaction will NOT appear in the financial reports. Transactions that are excluded from reports are usually NOT real income/expenses, such as wallet-to-wallet transfers, borrowing/lending, debt collection, debt repayment… Note: Since Borrowing/Lending transactions are not real income/expense transactions, they are not included in the report by default and this field will be hidden.
9. Image: Attach a picture to the transaction
10. Repeat: This allows you to create recurring transactions or those that will happen in the future. See more detail in the article How to use Planned Payments.
11. Create Template: Save the current transaction as a template. In the future, you can use this template to create new transactions without having to re-enter all the transaction information.
Check out more tutorials:
- Getting Started with Smiley Budget & Money Manager
- Create and manage categories
- How to use Events (Labels)
- How to use Planned Payments
- How to share data with your trusted people
- Create Savings Goals
Smiley Budget & Money Manager is one app for all your finances. You can track income, expenses, savings, debt, revenue and expenditure planning, cost control, bill payment reminders… You can download the app here.